Getting started with Canary Flex
The first batch of Canary Flex devices began shipping this month—some of you may already have your hands on a brand new Canary Flex.
https://twitter.com/toffer/status/806818300747481088
We’re so excited to finally deliver this revolutionary product that we’ve spent so long designing, developing, building, and testing. And we can’t wait for you to get your hands on the most versatile and innovative home security that exists today.
Oh my goodness @canary this is so beautiful! #packagelove #gooddesign pic.twitter.com/zPulyanoAV
— It’s Rose (@Rose_Thibodeaux) December 18, 2016
Canary Flex has so many potential applications, and we want to make it as easy as possible for you to get the most out of your Canary Flex from day one. You can read a full guide to getting started with Canary Flex here, and learn how to optimize battery life here, and below we’ve summarized some quick tips you’ll want to know as soon as you unbox your brand-new Canary Flex device.
Finding the right spot
The first and most important thing to decide when you’re setting up your Canary Flex is where to position it in your home, making sure the camera monitors the area you need, and has a strong Wi-Fi connection.
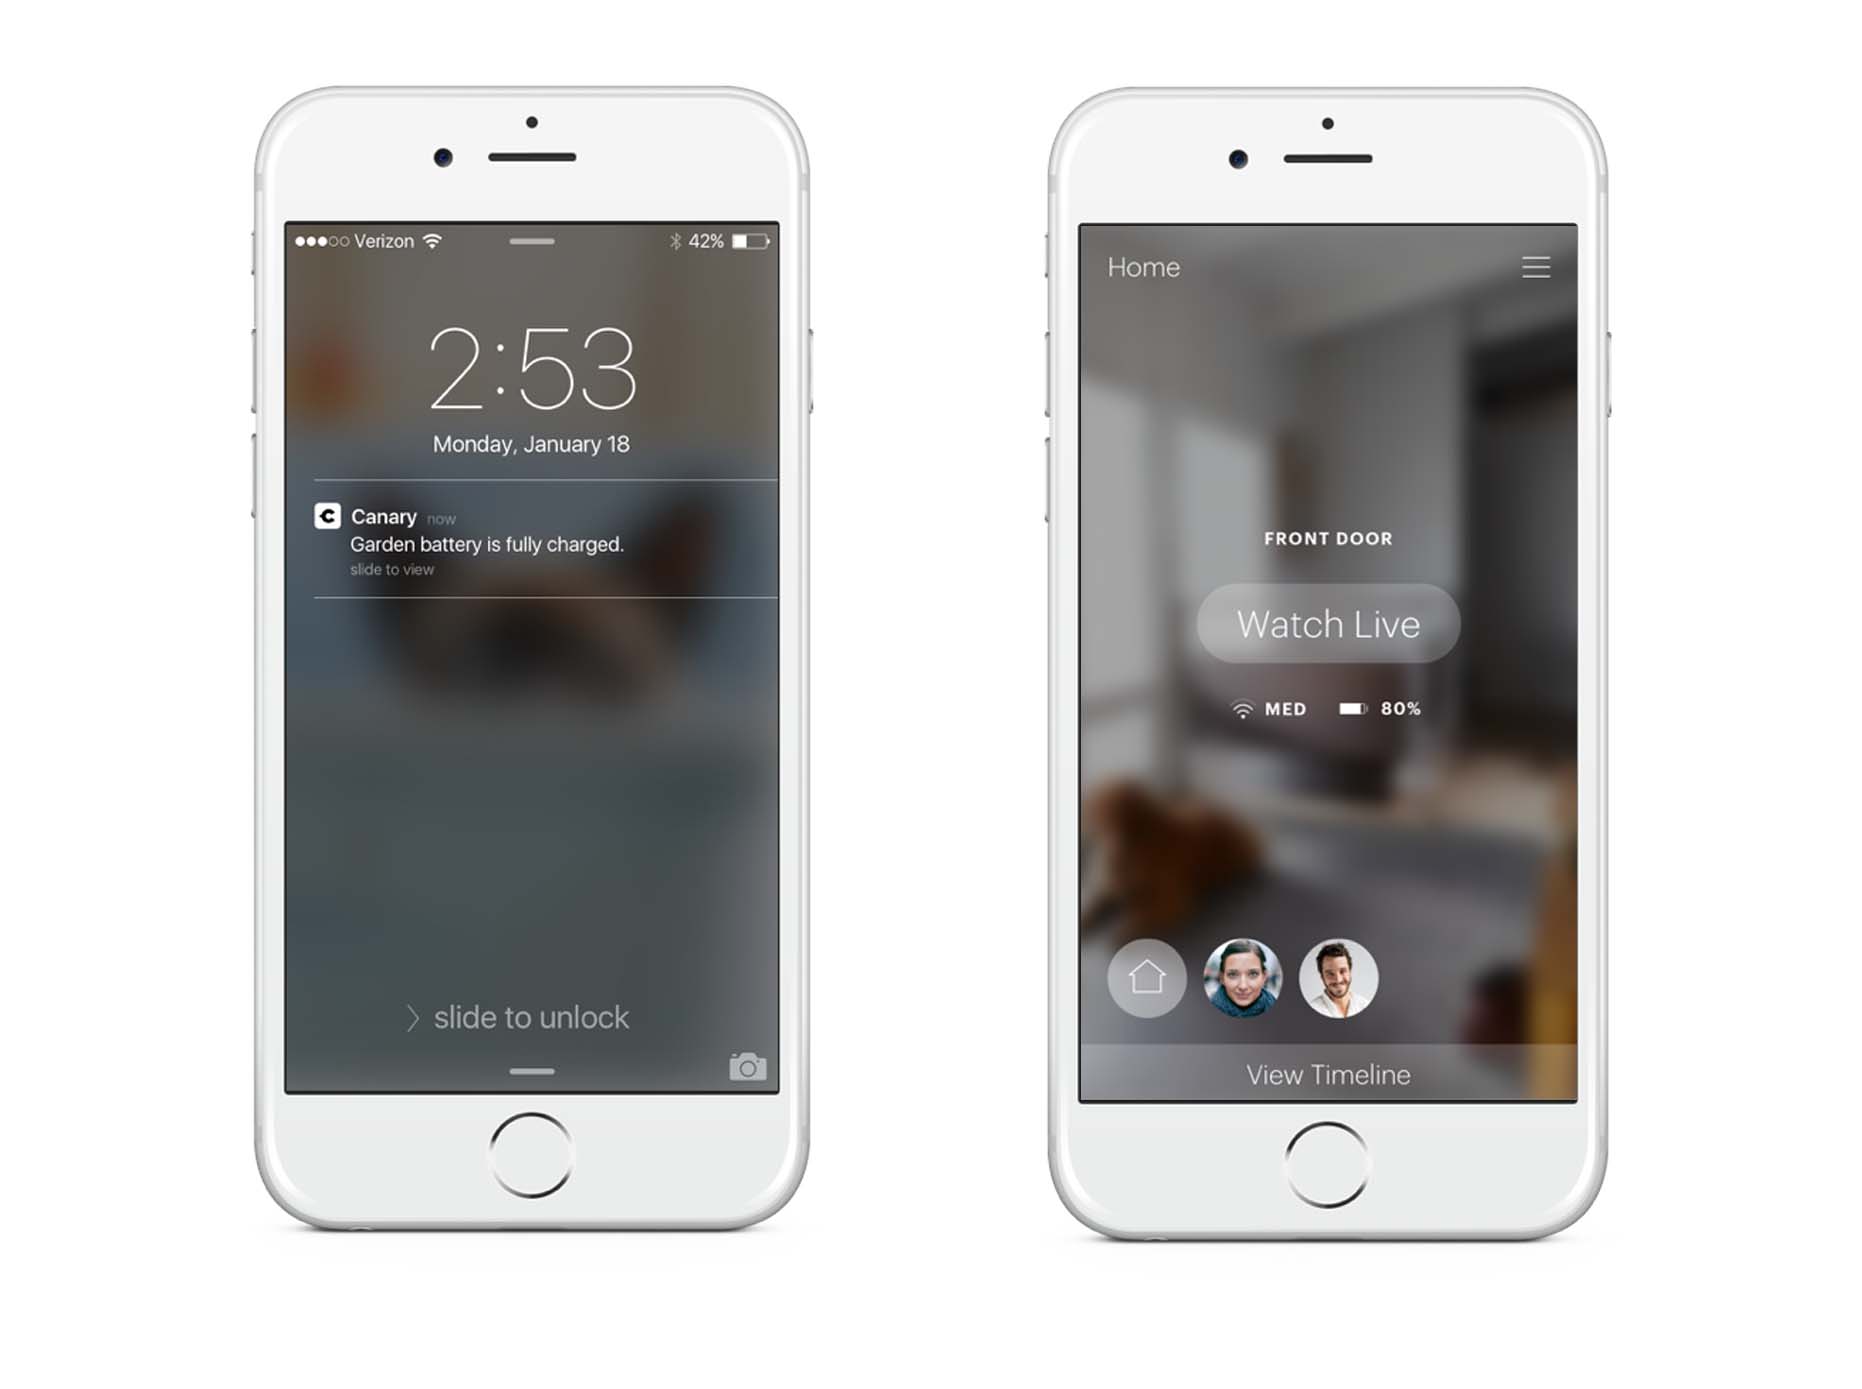
Testing Wi-Fi Connection
The app home screen has a Wi-Fi indicator that lets you know how strong your connection is, but you can also test watching live when you think you’ve found the right spot—if you can stream uninterrupted video from Watch Live, the Wi-Fi connection is strong enough and you’ve found a good spot.
Indoors or Outdoors
If you’re using Canary indoors, we recommend keeping your device plugged in at all times for the best experience—this means you’ll want to put Canary Flex within 6ft of a power outlet. Even if you are using Canary Flex wire-free, remember to keep your charging cable and plug handy for when you need to charge your device.
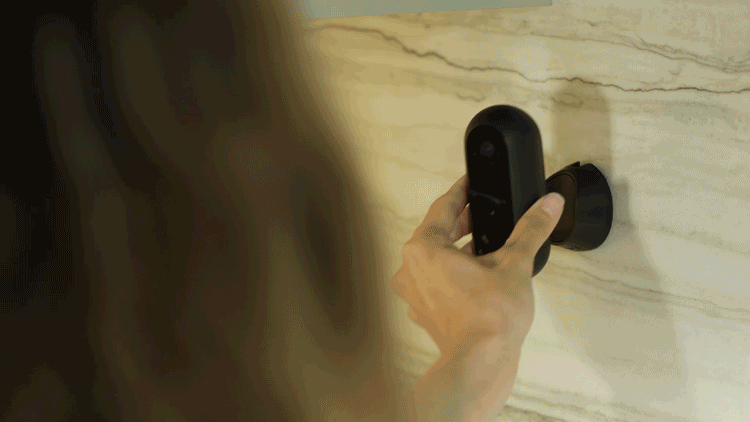
Mounting Height
If you’re wall-mounting Canary Flex indoors or outdoors, the ideal height for placement is around 8ft above the ground, with the device facing towards the area you want to monitor. Again, before mounting we recommend watching live with the Canary app while holding the device in place. Once you’re happy with its position, mark the spot with a pencil and you’re ready to mount your Canary Flex.
Getting the angles right
Once the device is mounted, you can articulate Canary Flex so that it’s facing the area you want to monitor. If the device is at the front of your home facing towards the street, you might want to angle Canary Flex downwards so you don’t get notifications for every car or pedestrian that goes down your block.
Because Canary Flex can rotate 360 degrees on its base, you can experiment with positioning over the first few days of use, and make sure you’re only getting the notifications you need.
Maximizing battery life
Minimizing Motion Recording
The batteries in Canary Flex are designed to power your device for multiple months with normal usage. If Canary Flex is in an active area and recording a lot of activity the battery will drain faster. You should position and angle your device to eliminate as much background activity as possible while still monitoring the desired area.
If you’re monitoring your front door, for example, you don’t necessarily want to get an alert every time a car drives by, so simply angle Canary Flex downward so you see less of the road and more of the porch—simple!
Because Canary Flex is so mobile, you can easily adjust placement and positioning, and even use it to monitor different rooms at different times if you want. When you’re changing the position on the base, you can experiment with different positions or angles while watching live to make sure it’s just right.
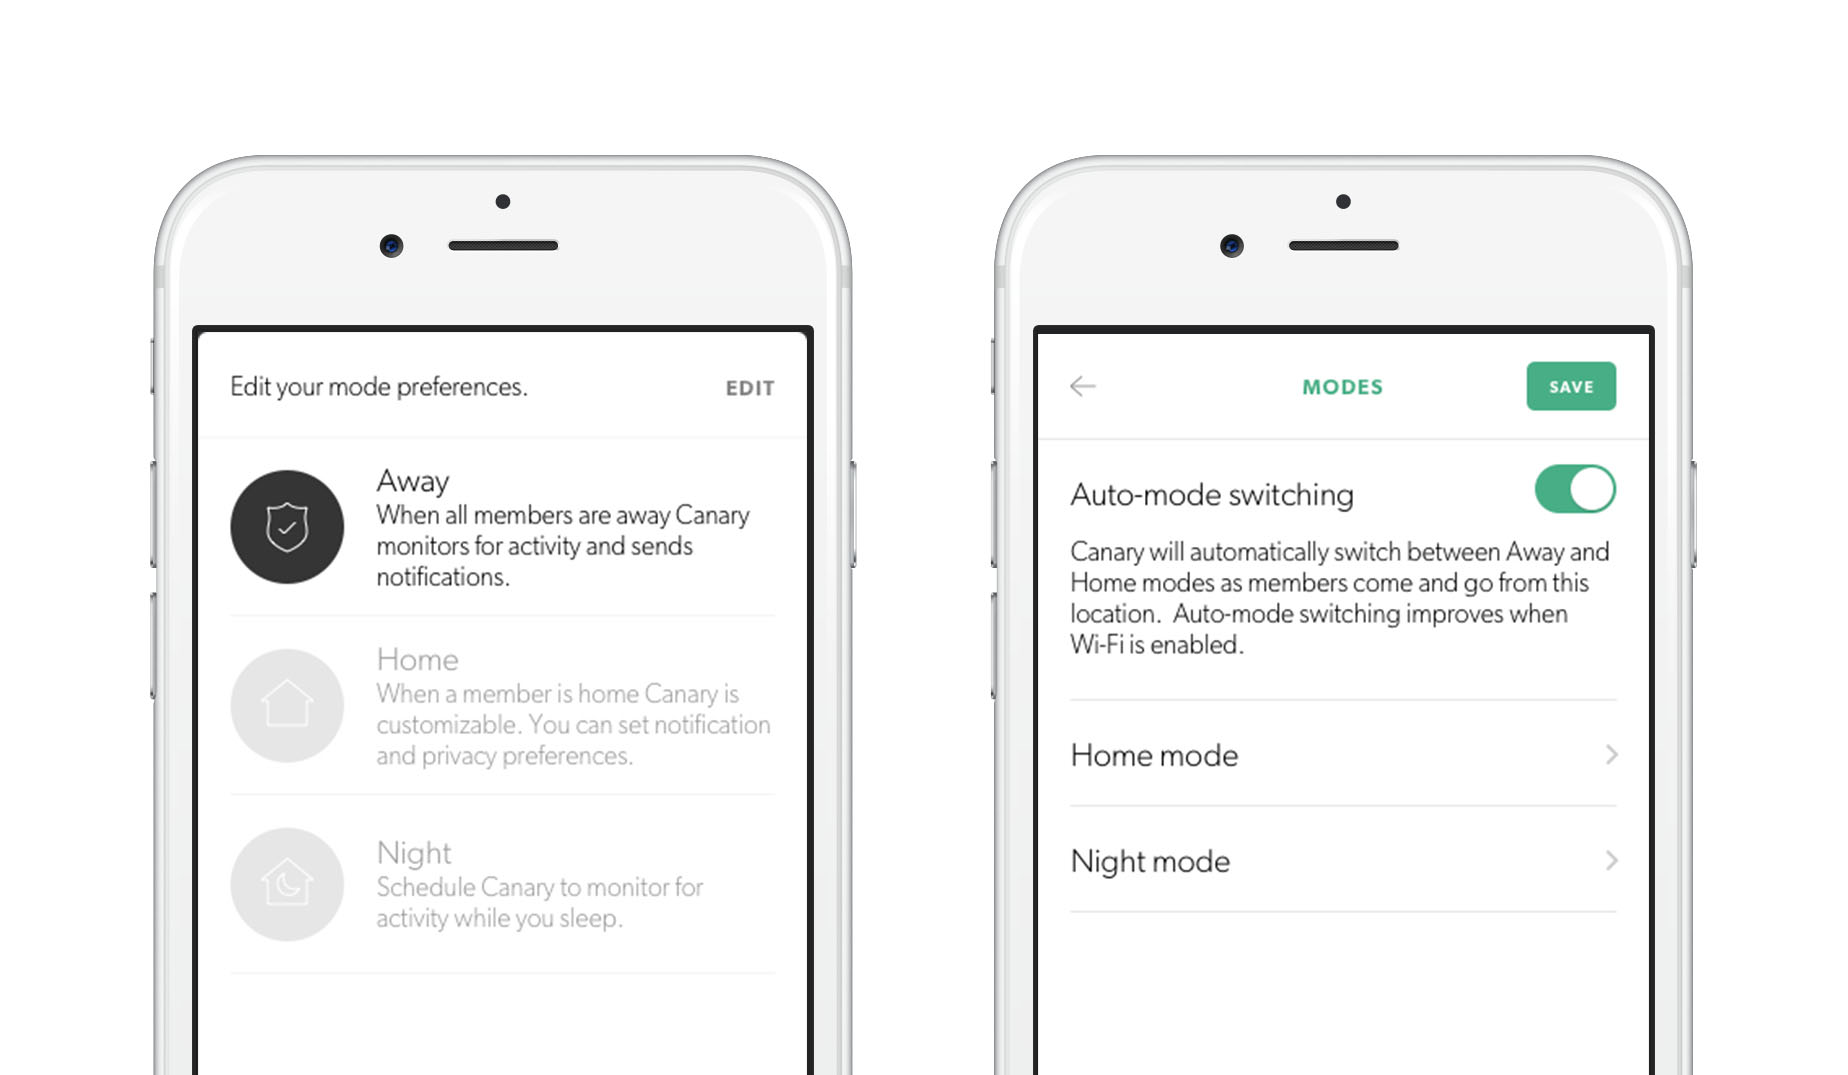
Customizing Mode Settings
If you want to reduce the how often Canary detects motion and records video, you can configure your settings so Canary doesn’t record activity while in home mode. This can be especially useful if you’re using Canary Flex indoors. You can customize auto-mode switching and customize home mode in your Modes settings.
Powering Up
Canary Flex uses two long-life lithium ion batteries (based on the same technology that’s used in Tesla’s cars!). The batteries, needless to say, are top of the line, but there are still a few things to know to make sure you squeeze every last bit of juice out of them.
Starting From Full
When you first get Canary Flex, we recommend charging the batteries to full, which should take a few hours, or about as long as charging a smartphone. The Canary app will send you a notification when the battery is fully charged, so you know when you’re ready to unplug.
Extreme Temperatures
Canary Flex is built to withstand even the harshest weather conditions, and will operate within a temperature range from -4° to 113° F.
Like most batteries, Canary Flex’s battery will drain more quickly in extreme cold, and will charge a little slower than usual in low temperatures too. So, if you’re leaving home for a while and live in a colder clime, you should make sure your Canary Flex is fully charged right before you leave to make sure your batteries last as long as possible.
Battery Notifications
Canary Flex can let you know when it needs to be charged—you can change your battery notification settings from Settings>Notifications. Keep an eye on your battery level right on the Home Screen of the Canary app, or enable battery notifications to be reminded when your device needs to be charged again.
Router Problems
If you’re noticing Canary Flex is having connection or notification issues, the device may have issues communicating with your home’s router. If you’re having problems, make sure to send us an email to support@canary.is and we’ll get to the bottom of it.
Get in touch
We can wait to hear your thoughts on Canary Flex once it arrives, so make sure to leave a message in the comments below, or on Twitter, Facebook, or Instagram. If you have any questions or need some help with your device, you can contact us 24/7 at support@canary.is, or by tweeting @canarysupport.
You must be logged in to post a comment.